
What a stainless splashback does in a working kitchen
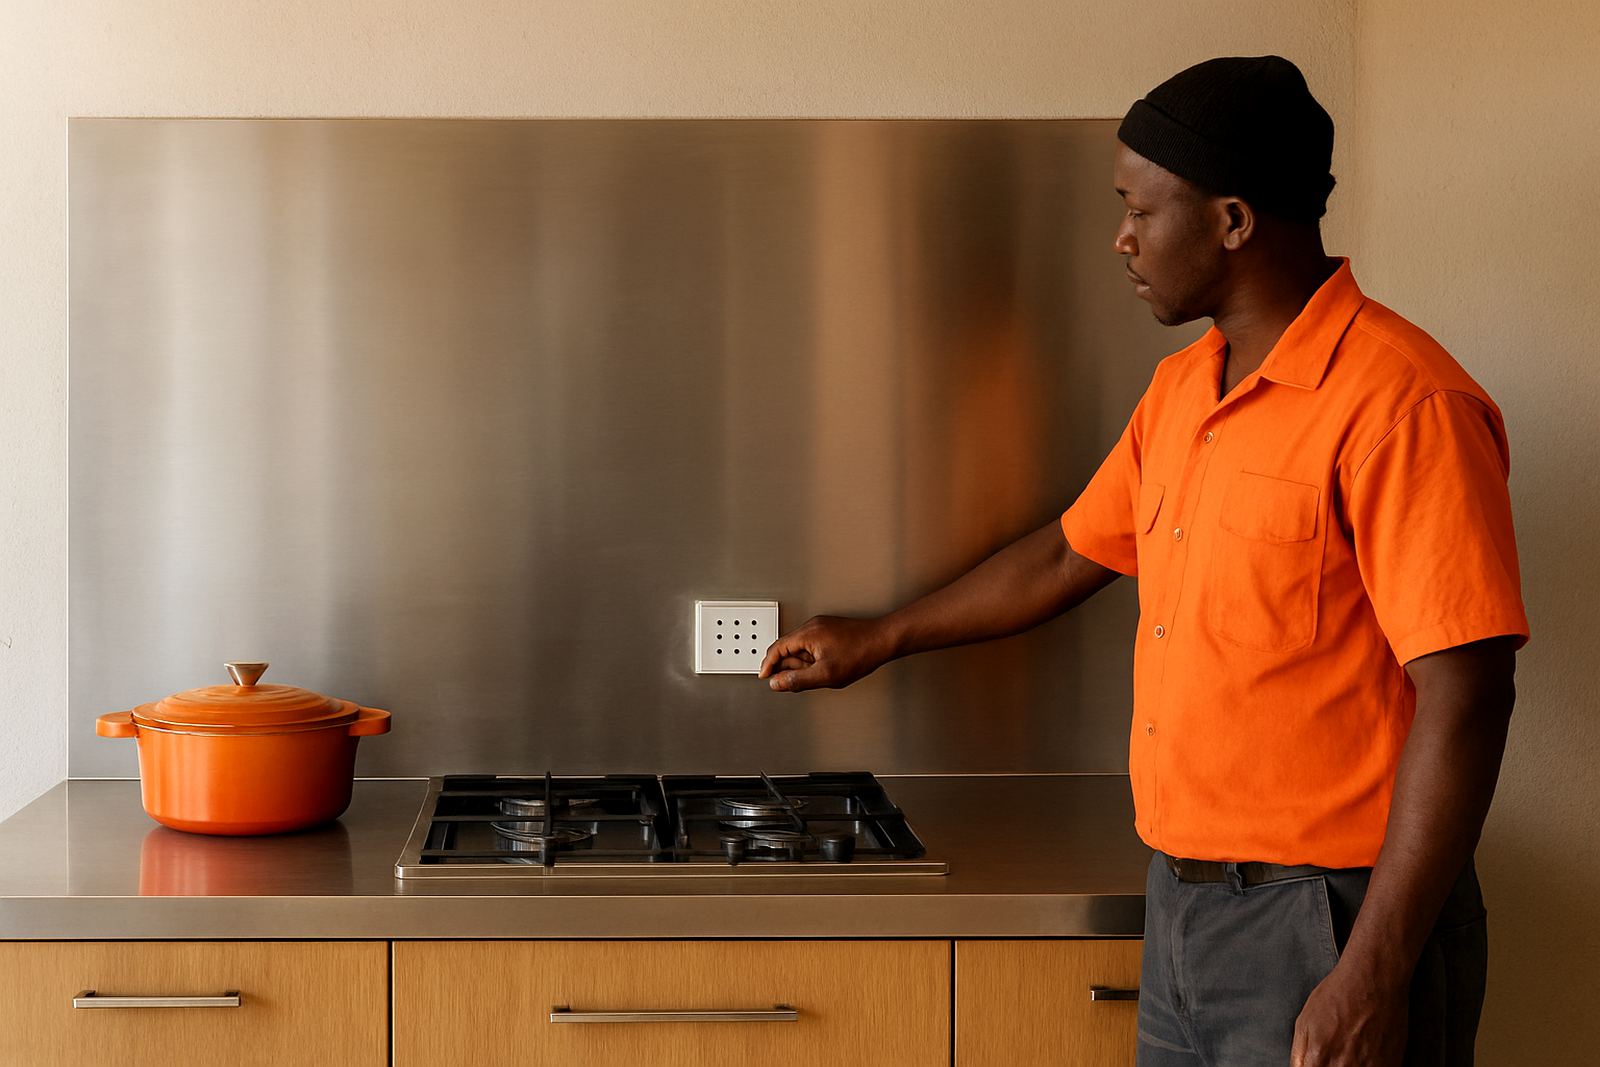
A stainless splashback is a solid wall lining fitted behind a sink, hob or prep area to protect plaster, paint and tiles from water, grease and heat. It is a practical choice when you want one clean surface that wipes down quickly and holds up well in humid coastal conditions. In Knysna, Sedgefield and George, we often fit splashbacks where timber cabinets, painted walls and grout lines would otherwise pick up marks too fast.
We make each splashback to fit the wall space exactly, with cut-outs where needed for sockets, switches, water points or gas connections. The finish can be kept simple and plain, or matched to the rest of the kitchen layout with neatly folded edges and concealed fixings where the wall allows it. It is a good option for new builds, upgrades and repair jobs where the old wall covering has become stained or damaged.
- Protects walls from splashes, heat and everyday wear
- Wipes clean with standard kitchen cleaners
- Suitable for kitchens, sculleries, braai areas and utility walls
- Works well in coastal homes where moisture and salt air are a concern
Sizes, sheet options and finish choices
Our splashbacks are cut to size from stainless sheet, then folded and finished to suit the wall. Typical thicknesses are 1.0 mm and 1.2 mm, depending on the size of the panel and the level of use expected. Smaller splashbacks behind a sink may only need a single panel, while larger cooking walls often need a few joined sections for a cleaner fit and easier handling on site.
We can supply panels in common household sizes or work from your own measurements if the wall is already prepared. Standard height often follows the gap between the counter top and the bottom of the cupboards, but we also make full-height wall linings for sculleries and prep rooms. Openings for power points, tap bases and pipe chases are marked and cut during fabrication so the final fit is neat.
- Sheet thickness: 1.0 mm or 1.2 mm, depending on application
- Panel height and width: made to your wall size
- Edge finish: folded return, square edge or trimmed to suit the installation
- Cut-outs: sockets, switches, taps, gas lines and service points
The surface can be supplied in a brushed look that hides small marks well, or in a smoother finish where you want a cleaner visual line. We will usually recommend the more practical option for the room, especially in busy family kitchens or outbuildings where heavy use is expected.
Where splashbacks work best around the Garden Route
Stainless splashbacks suit kitchens where water, steam and frequent cleaning are part of daily use. We fit them behind hobs, beside sinks, around scullery basins and on utility walls where washing machines, prep sinks or storage counters are installed. They also work well in braai rooms, food prep corners, staff kitchens and rental units where the wall finish must stay presentable with limited upkeep.
Because the Garden Route has varied weather and a fair amount of coastal humidity, stainless is often a better long term choice than painted board in rooms that see regular moisture. In Mossel Bay and Plettenberg Bay, for example, we often see walls near the stove or sink begin to show marks sooner than expected. A properly fitted splashback helps slow that down and keeps the area easier to maintain.
- Behind gas hobs and electric cookers
- Under wall cupboards and around sinks
- In sculleries and laundry rooms
- In holiday homes, guest units and staff kitchens
- On utility walls where hygiene and cleaning matter
When we survey a site, we also check the wall condition. If plaster is uneven, damp or cracked, that needs to be dealt with first or the panel may not sit flush. A good fit starts with a solid wall, not just a nice sheet of steel.
Measuring, fabrication and fitment on site
Accurate measuring is the main part of a good splashback job. We start by checking the wall length, height, corner angles and the position of all fittings. If the counter top is not level, or the wall runs out slightly, we note that before cutting. This avoids gaps and makes the final result look deliberate rather than patched in later.
Fabrication takes place at our Knysna Industria base, where we cut, fold and prepare each panel before installation. For some kitchens we also make a small test fit, especially where there are several services passing through the wall. On site installation is arranged to suit the home or business, and we work around other trades where needed. If the area is occupied, we keep the job tidy and plan the work to reduce downtime.
- Site measuring before fabrication
- Shop drawings where the wall has multiple services
- Cutting and folding in our workshop
- Onsite installation and final alignment
For most splashbacks, there is no heavy power requirement beyond normal workshop tools during fitment. If you are combining the job with a new hob, extractor or gas appliance, those connections should be planned separately by the relevant installer. We do not guess around live services, especially where gas lines or electrical points are close to the splashback line.
What to check before you order
Before we start fabrication, it helps to have a few details ready. The more accurate the information, the better the fit and the fewer changes are needed once the panel is made. A splashback may look simple, but small differences in wall length, socket positions and corner returns can affect the final result.
- Wall length and finished height in millimetres
- Position of sockets, switches, taps and pipe work
- Type of appliance below the splashback, gas or electric
- Whether the wall is tiled, painted, plastered or clad
- Any existing gaps, uneven corners or damp patches
- Preferred finish and edge detail
If you are replacing an old splashback, send us a photo and the rough dimensions first. That helps us see whether the old panel was fitted over tiles, screwed direct to the wall, or sealed into a corner. We can then advise if the new piece should be made as one panel or split for easier handling. A quick check now saves time later and avoids unnecessary holes in the wrong place.
Cleaning, care and later servicing
Daily care is simple. Wipe the splashback with warm water and a soft cloth, then dry it if you want to reduce water spotting. For grease marks, use a mild kitchen cleaner and avoid abrasive pads that can scratch the surface. In coastal homes, regular wiping helps keep salt film from building up near open windows or extractor fans.
We also offer maintenance checks and stainless repairs if the panel gets dented, marked or damaged during later alterations. If a socket position changes or a new appliance is installed, we can assess whether the existing splashback can be adjusted or whether a new section makes more sense. Small changes are often easier to manage early, rather than waiting until the wall finish starts to fail.
- Use soft cloths and mild cleaners
- Avoid steel wool and harsh scouring powders
- Check sealant lines near sinks and work tops
- Report dents, loose fixings or water seepage early
Good care keeps the panel looking tidy for years, but the seal along the bottom edge is just as important as the steel itself. If water is getting behind the splashback, that needs attention quickly so the wall below does not start to blister or stain.
Key facts
| Material | Stainless steel sheet, cut to size |
|---|---|
| Common thickness | 1.0 mm or 1.2 mm |
| Typical use | Kitchens, sculleries, braai areas and utility walls |
| Finish options | Brushed or smooth finish |
| Installation | Site measured, fabricated, then fitted onsite |
| Service areas | Knysna, Plettenberg Bay, Sedgefield, Wilderness, George and Mossel Bay |